This article explains the steps required when migrating a Jira Cloud instance to Jira Server/Data Center when you were using JMWE workflow extensions on your JIRA Cloud instance.
...
See here for the Cloud to Server migration challenges/limitations.
Migrating workflows
Before you begin fixing your workflows, publish all your workflows to avoid duplicate work (between the draft and corresponding published workflow)
| Table of Contents |
|---|
Step 1 - Backup the Cloud instance and open the XML file
...
Find the text
"DelegatingPostFunction"Right above the search under the
“full.module.key”find the post-function nameWrite down the post-function name in the table
Work your way up on the file from the line that contains "DelegatingPostFunction" to find the name of the transition on which the post-function is configured. You can identify it under the
<actions>tag.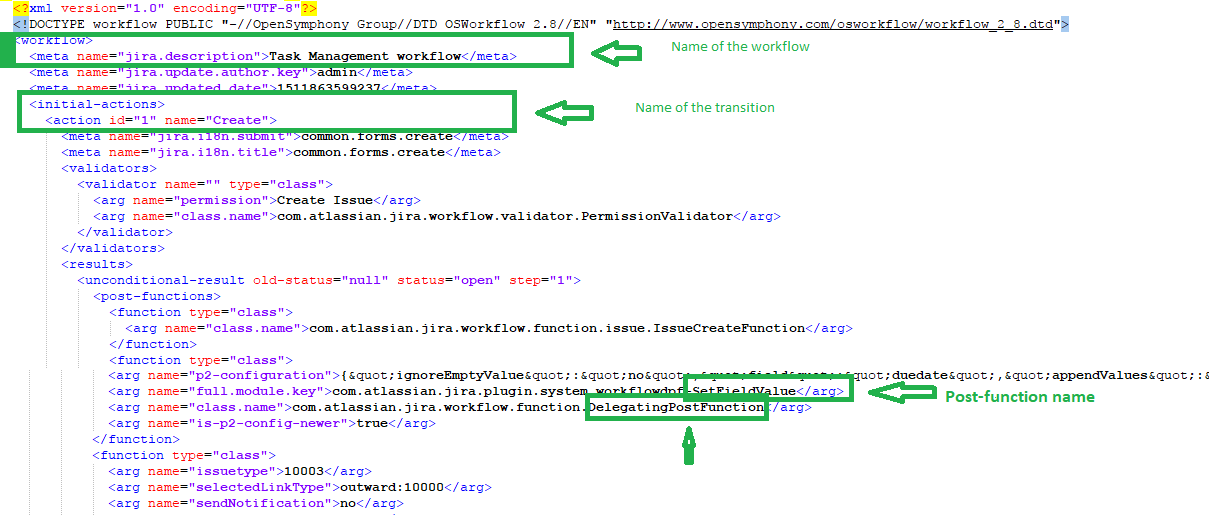

Write down the transition name in the table.
Work your way up further on the file from the line you have found the transition, to find the name of the workflow. You can identify it under the
<Workflow>tag. Refer to the above image.Write down the workflow name.
Find the next instance of
DelegatingPostFunctionRepeat steps 2 to 6 until you reach the end of the file.
Repeat steps 1 to 7 but searching for
RemoteWorkflowPostFunctionProviderinstead ofDelegatingPostFunctionNow you will have a list of transitions and their corresponding workflow name.
...
At the end of this step, you will create a table with the workflow name and the transition names of all the workflows that contain JMWE post-functionsconditions.
Find the text
com.atlassian.jira.workflow.condition.JiraExpressionWorkflowConditionBelow the search under the argument
“full.module.key”find the condition nameWrite the condition name in the table
Work your way up on the file from the line that contains
com.atlassian.jira.workflow.condition.JiraExpressionWorkflowConditionto find the name of the transition on which the condition is configured. You can identify it under the<actions>tag.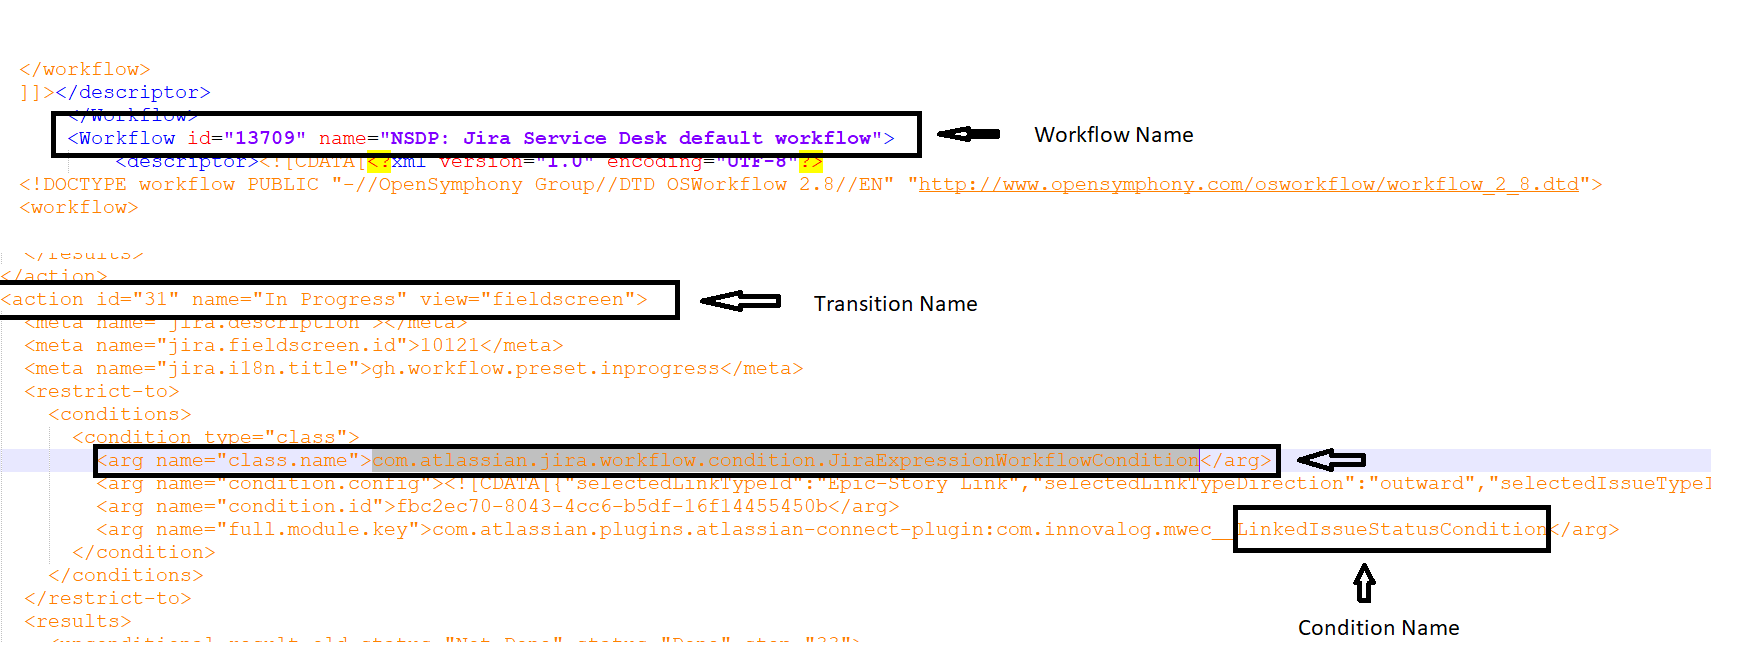

Write down the transition name in the table.
Work your way up further on the file from the line you have found the transition, to find the name of the workflow. You can identify it under the
<Workflow>tag. Refer to the above image.Write down the workflow name.
Find the next instance of
com.atlassian.jira.workflow.condition.JiraExpressionWorkflowConditionRepeat steps 2 to 6 until you reach the end of the file.
...
At the end of this step, you will create a table with the workflow name and the transition names of all the workflows that contain JMWE post-functionsvalidators.
Find the text
com.atlassian.jira.workflow.validator.JiraExpressionWorkflowValidatorBelow the search under the argument
“full.module.key”find the validator nameWrite the validator name in the table
Work your way up on the file from the line that contains
com.atlassian.jira.workflow.validator.JiraExpressionWorkflowValidatorto find the name of the transition on which the condition is configured. You can identify it under the<actions>tag.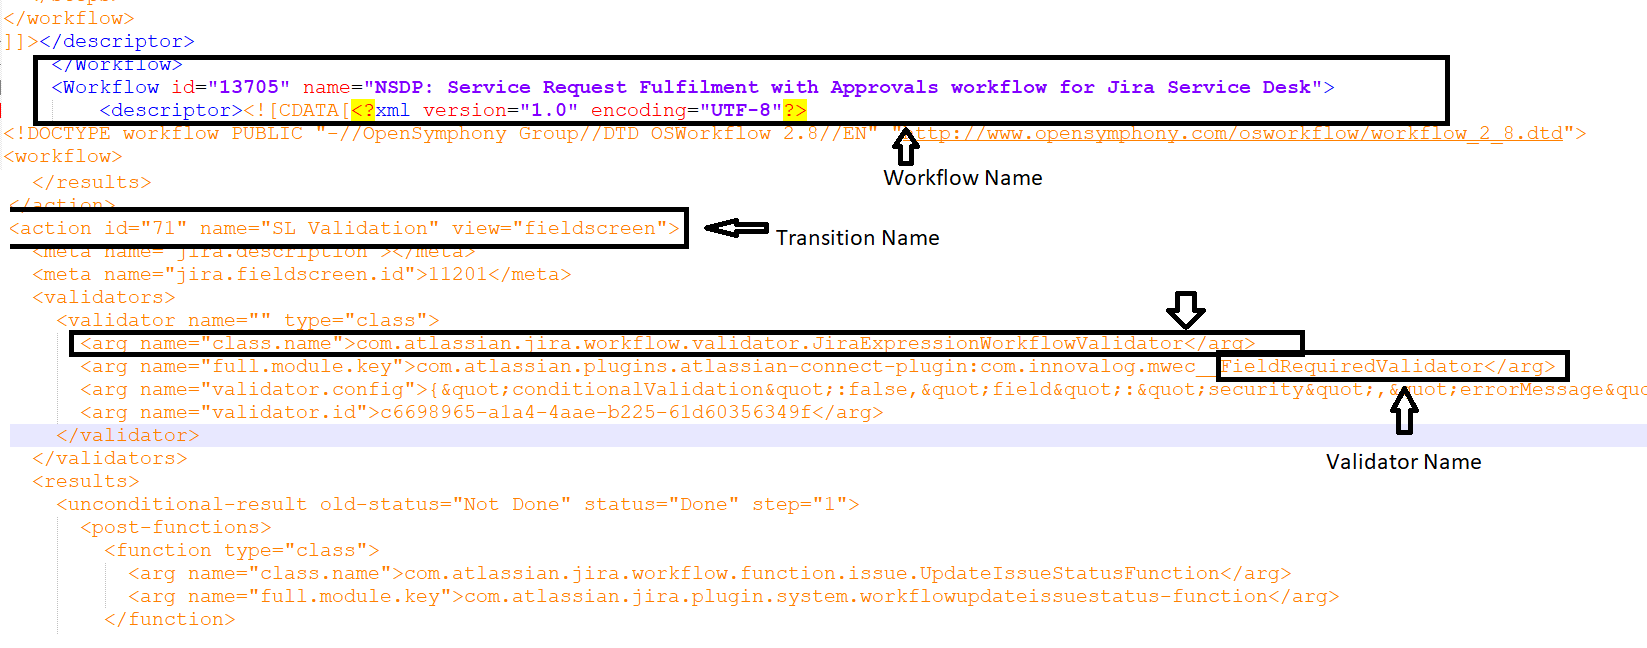

Write down the transition name in the table.
Work your way up further on the file from the line you have found the transition, to find the name of the workflow. You can identify it under the
<Workflow>tag. Refer to the above image.Write down the workflow name.
Find the next instance of
com.atlassian.jira.workflow.validator.JiraExpressionWorkflowValidatorRepeat steps 2 to 6 until you reach the end of the file.
...