Shared actions allow you to create actions that run one or more post-functions (in a sequence). These actions can then be used in the Shared Action post-function that can be added to multiple workflow transitions. In essence, the shared actions feature enables you to create shared post-functions (that run in a sequence), and add them to various transitions across workflows. This helps you reuse the most common configurations making the maintenance of your workflows simple.
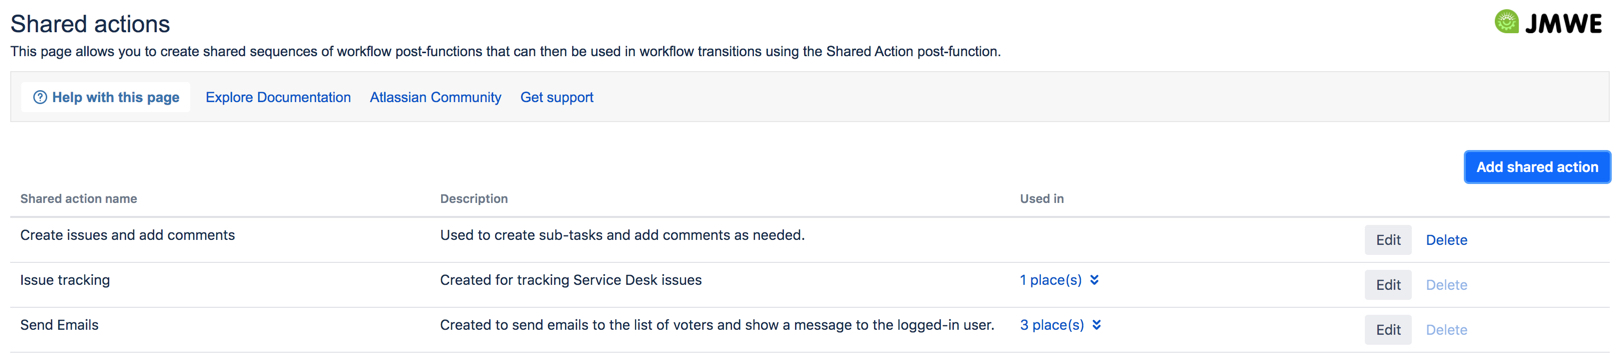
Navigate to the Shared actions page using Jira Settings → Manage apps → Shared actions. This page lists all the existing shared actions and displays where each shared action is used. A shared action can be used in:
Other shared actions
This page also allows you to add new shared actions, or edit or delete an existing action.
| Table of Contents | ||||
|---|---|---|---|---|
|
Add a shared action
To add a shared action:
Navigate to Jira Settings → Manage apps → Shared actions.
Click
Add shared actionto navigate to Shared actions editor where you can add the configuration details.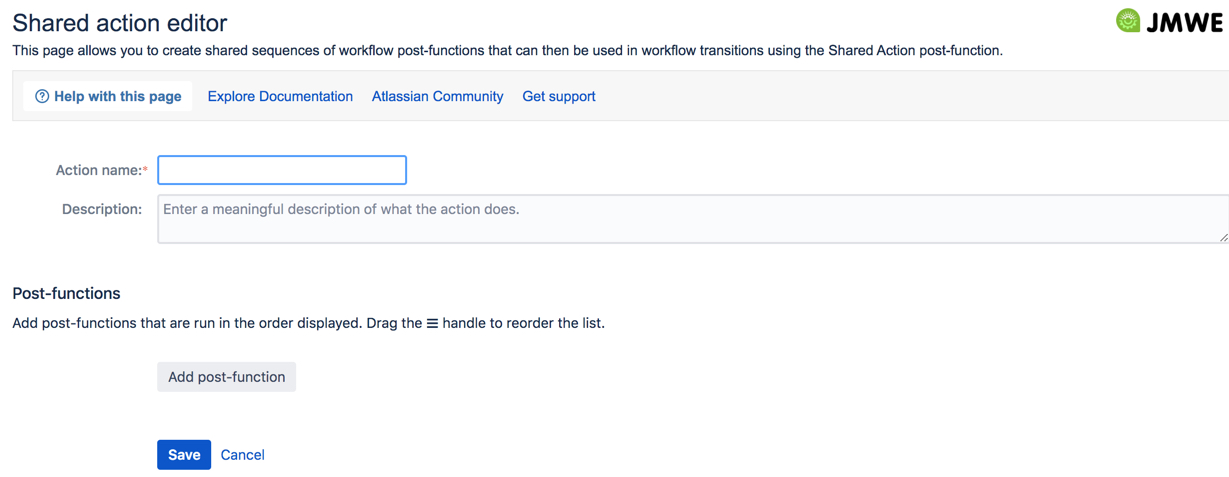
Add the following:Action name: Enter a meaningful name for the action.
Description: Enter a more detailed explanation of what the action would accomplish.
Post-functions: Click
Add post-functionto navigate to the window that lists all the available post-functions. Select a post-function, configure as needed and add it to the list here. The post-functions added here are run in the sequence displayed. You can use the ☰ handle to drag a post-function and drop it wherever required in the list to reorder the sequence.
UseEditorRemoveto make changes to the respective post-function or delete it from the list here.
Click
Saveto add the newly created shared action to the Shared actions screen.
| Note |
|---|
You see a warning message whenever you try to configure a shared action within itself indirectly. For example, consider two shared actions SA1 and SA2, where SA1 is used in SA2. When you edit SA1, if you select SA2 while adding the Shared Action post-function, you are indirectly using SA1 within itself. Such a configuration might create an infinite loop. To avoid this scenario, verify the configuration before adding a Shared Action post-function to your shared actions. |
Edit a shared action
Click
Editin the Shared actions screen to modify the respective shared action.Modify the action details in the Shared action editor screen.
Click
Saveto save the changes.
When you try to add a Shared Actionpost-function while editing a shared action, you notice that the shared action is disabled for selection. This is to avoid creating an infinite loop by adding the shared action to itself.
Delete a shared action
Click
Deletein the Shared actions screen to remove the respective shared action permanently.Click
OKin the confirmation dialog to confirm. The shared action is deleted.
The Delete button is disabled when the respective shared action is used in:
Workflow transitions or
other shared actions
You need to remove the references to delete a shared action.
Use one shared action in another
You can use an existing shared action that has with a specific sequence of post-functions that fits your requirement, in another shared action while creating or editing it. For example, consider an existing Send Emails shared action that used the Email issue and Comment issue post-functions in the order mentioned. Now, say you want to use this shared action in the Create issues shared action that uses the Create / Clone issue(s) and Comment issue post-functions.
To add Send Emails to Create issues:
Navigate to Jira Settings → Manage apps → Shared actions.
In the Shared actions screen, click
Editagainst the Create issues shared action.In the Shared action editor screen:
Click
Add post-functionto navigate to the window that lists all the available post-functions.Select the Shared Action post-function.
In the configuration screen, select the Send Emails shared action.
Click
Add.(Optional) Use the ☰ handle to drag the Shared Action post-function and drop it wherever required in the list to reorder the sequence.
Click
Save.