This section explains the installation of the add-on on your local JIRA server. You must be a JIRA administrator to carry out the instructions on this page.
If you are upgrading from 1.x to 2.0.0 we strongly recommend that you read the upgrade guide before upgrading.
Installing within JIRA (Recommended)
It is recommended to install the JIRA Misc Custom Fields add-on from the Find new add-ons page within your JIRA instance.
To install the add-on, follow these steps:
- Log in to JIRA as an administrator.
- Go to the Administration icon
 and click on it.
 - Locate Add-ons from the menu and click on it. Validate your credentials if needed.
- Click on Find new add-ons and locate JIRA Misc Custom Fields via search.
- Buy or evaluate the add-on with a free 30-day trial.
- Click on Install.
- A license gets generated and you are to ready to go! For information on configuring the license, see Configuring License.
You have installed the JIRA Misc Custom Fields add-on. To verify that the installation was successful, see Post-Installation.
On this page:
Installing from the Atlassian Marketplace
To install, follow these steps:
- Go to the Atlassian Marketplace page for JIRA Misc Custom Fields and select
Serverfrom the drop-down at the right. Click on Get it now to download the latest version of the jar file or go to the Version history of the add-on and download it.
- Now, log in to JIRA as an administrator.
- Go to the Administration icon and click on it.
- Locate Add-ons from the menu and click on it.
- Click on Manage add-ons.
- Click on
 and upload the jar file.
 - To configure the license, see Configuring License.
You have installed the JIRA Misc Custom Fields add-on. To verify that the installation was successful, see Post-Installation.
While installing the add-on, make sure that the add-on and JIRA versions are compatible.
For more information, see Add-on and JIRA version compatibility.
Installing a SNAPSHOT(test) version
Our Support team might provide you with a test version of the add-on, through a link posted in a response to a support request.
To install it, follow these steps:
- Log in to JIRA as an administrator.
- Go to the Administration icon and click on it.
- Locate Add-ons from the menu and click on it.
- Click on Manage add-ons.
- Click on and upload the jar file.
You have now uploaded the new version of the JIRA Misc Custom Fields add-on. To verify that the installation was successful, see Post-Installation.
Once the final version of the add-on is released, you will need to uninstall the add-on and re-install it from Find new add-ons. If you don't, JIRA will stop offering upgrades to newer versions. For more information, see Installing within JIRA.
Configuring the License
The license key is automatically configured into the add-on configuration for free trial licenses as well as licenses purchased using the Buy button on the Manage Add-ons page.
For licenses purchased on the Atlassian Marketplace website, follow these steps:
- In JIRA go to the Administration icon and click on it.
- Locate Add-ons from the menu and click on it.
- Click on Manage Add-ons and locate JIRA Misc Custom Fields via search.
- Click on
 icon in the
 License keyfield. To know how to locate your license key see, Locate and Update License. - Enter the purchased license in
License keyand click on Update.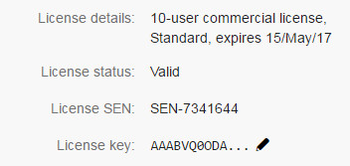
Add-on and JIRA version compatibility
To check the compatible add-on versions for your JIRA version follow these steps:
- Go to the Atlassian Marketplace page for JIRA Misc Custom Fields.
- Click on Versions. Click on See all _ versions at the right.
- Download the version that is compatible with your JIRA version. See the image below for reference.

Additional Information
To extend your Evaluation License visit: https://confluence.atlassian.com/display/JIRADL/Extending+your+JIRA+evaluation.
To update your License details visit: https://confluence.atlassian.com/jira064/updating-your-jira-license-details-720412040.html.
Next Step: Post-Installation