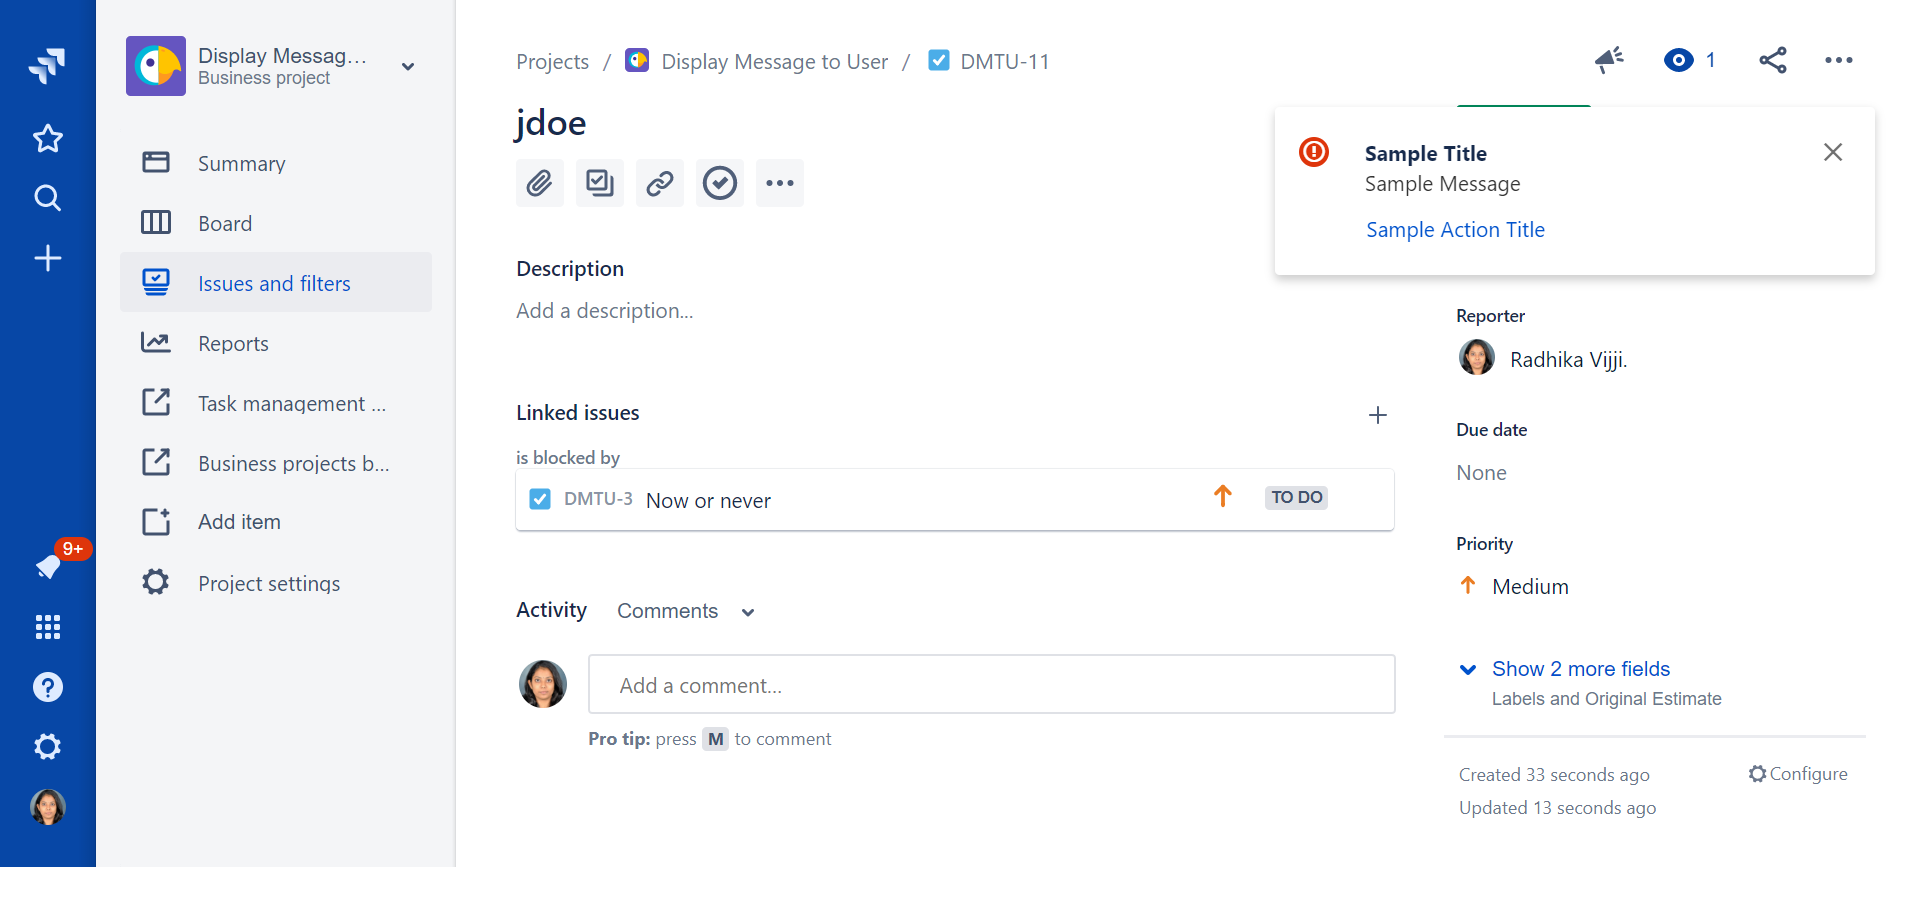
The displayed message can be customized using the options (explained below) in the post-function configuration. Here is a sample message on the new issue view.
This will not work on Jira Software boards nor Jira Service Desk customer portals
To add 'Display Message to User' post function to a transition:
Click Edit for the workflow that has the transition, you wish to add the post-function on.
In the Workflow Designer, select the transition.
Click on
Post Functionsin the properties panel.Click on
Addpost function.Select
Display Message to Userfrom the list of post-functions.Click on
Addto add the post-function on the transition..png?version=1&modificationDate=1581931756243&cacheVersion=1&api=v2&width=238&height=326)
Input a Message title and Message body. To input issue or transition or currentUser information see, How to insert information using Nunjucks annotations.
Click on
Addto add the post-function to the transition.
See here for a use case for a post-function.
Known issues common to all post-functions:
Troubleshooting this post-function configuration: In case the post-function does not work as expected these are the things to look out for
JMWE shows an error message on the issue view if any error occurs during the execution of the post-function. This message is displayed only if the current user is a Jira administrator.
When you add this post-function to a transition and trigger the transition, a message is displayed to the user triggering the transaction, as a “flag” in the top right corner of the issue view page. You can also use Nunjucks annotations to insert issue, transition, and current user information into the Message body and Action type, using the 'issue', 'transition' and 'currentUser' variables, respectively. You can customize the post-function using the following options:
Options
Message type: Select the type of message box ("flag") to display. It can be one of "Info", "Success", "Warning" and "Error".
Auto close: Select this option if you want the message box to disappear automatically after a few seconds.
Action link
You can add an action link to the message which, when clicked, can navigate to another issue or to an arbitrary URL. To add an action link, select the "Add action link" checkbox:
Action title: Input the title of the action link that will be displayed at the bottom of the message.
Action type: Select the type of action to be performed.
Navigate to URL: Input a text that represents a valid URL or a Nunjucks template that returns a valid URL. For example:
https://www.innovalog.com
Navigate to another issue: Input a valid issue key or a Nunjucks template that returns an issue key. For example:
TEST-1
{{ issue.fields.parent.key }}
Conditional execution
To execute this post-function based on the result of a Nunjucks template see Conditional execution.
Delayed execution
Post functions are provided with an option to delay their execution. You need to select the number of seconds to wait until the post-function is run, a default of 1 sec to a maximum of 20 seconds.
Workflows that depend on post functions being executed in a specific order fail due to the asynchronous nature of the Connect post-functions in Jira Cloud. One of the workarounds is to delay the execution of the post-functions and thereby create a more predictable execution order. For example, on the approval of a Story you want to create sub-tasks and immediately transition them; in this case, you will have to delay the execution of the Transition Linked Issues post-function, so that the sub-tasks are created before they are transitioned. See the use case below.
It is recommended to use the Sequence of post-functions post-function or Shared Action post-function post-function to run a list of post-functions in a sequence instead of applying a delay.
Sample use cases for Delayed execution
![]() On the creation of a Bug, assign it to a member of the QA team and then add the Assignee to the Watchers.
On the creation of a Bug, assign it to a member of the QA team and then add the Assignee to the Watchers.
![]() On the approval of a Story, create subtasks for Development and QA, and transition them to In Progress status.
On the approval of a Story, create subtasks for Development and QA, and transition them to In Progress status.
Use case
A typical use case for this post-function is to display a message on the issue view after a transition. Consider a use case where you want to display a notification message on the issue view if a new issue has been created by the Create Issue(s) post-function with a link to the newly created issue. To configure this:
Add the Display Message to User post-function to a transition.
Input the "Message title" as
New issue createdInput the "Message body" as:
A new ticket has been created.
Select the "Message type" as
WarningSelect the "Action link" option
Input the "Action title" as
Go to the created issueSelect the "Navigate to URL" option
Input the URL as
https://myjira.atlassian.net/browse/{{ issue | issueProperty("jmwe.last.issue.created") }}
The message will be displayed as shown below in the issue view.

See here for more use cases